/*
-- New project --
This source code of graphical user interface
has been generated automatically by RemoteXY editor.
To compile this code using RemoteXY library 2.4.3 or later version
download by link http://remotexy.com/en/library/
To connect using RemoteXY mobile app by link http://remotexy.com/en/download/
- for ANDROID 4.5.1 or later version;
- for iOS 1.4.1 or later version;
This source code is free software; you can redistribute it and/or
modify it under the terms of the GNU Lesser General Public
License as published by the Free Software Foundation; either
version 2.1 of the License, or (at your option) any later version.
*/
//////////////////////////////////////////////
// RemoteXY include library //
//////////////////////////////////////////////
// RemoteXY select connection mode and include library
#define REMOTEXY_MODE__ESP8266WIFI_LIB_CLOUD
#include <ESP8266WiFi.h>
#include <DNSServer.h>
#include <ESP8266WebServer.h>
#include <WiFiManager.h>
#include <RemoteXY.h>
// RemoteXY connection settings
#define REMOTEXY_WIFI_SSID "YOUR_SSID"
#define REMOTEXY_WIFI_PASSWORD "YOUR_PASS"
#define REMOTEXY_CLOUD_SERVER "cloud.remotexy.com"
#define REMOTEXY_CLOUD_PORT 6376
#define REMOTEXY_CLOUD_TOKEN "d8c38ca0c2c88aa967ace214f508985c"
// RemoteXY configurate
#pragma pack(push, 1)
uint8_t RemoteXY_CONF[] =
{ 255, 1, 0, 2, 0, 23, 0, 10, 13, 0,
65, 14, 32, 23, 24, 13, 2, 0, 33, 24,
22, 11, 2, 26, 31, 31, 62, 0, 60, 0
};
// this structure defines all the variables and events of your control interface
struct {
// input variables
uint8_t switch_1; // =1 if switch ON and =0 if OFF
// output variables
uint8_t led_1_r; // =0..255 LED Red brightness
uint8_t led_1_g; // =0..255 LED Green brightness
// other variable
uint8_t connect_flag; // =1 if wire connected, else =0
} RemoteXY;
#pragma pack(pop)
/////////////////////////////////////////////
// END RemoteXY include //
/////////////////////////////////////////////
void setup()
{
RemoteXY_Init ();
WiFiManager wifiManager;
wifiManager.autoConnect("ARDUTECH");
}
void loop()
{
RemoteXY_Handler ();
// TODO you loop code
// use the RemoteXY structure for data transfer
// do not call delay()
}
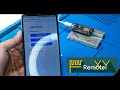
طبعا احنا في الدرس ده شرح طريقه تشغيل المفتاح على ( nodemcu ) مع منصه ريموت اكس واي في هذا الدرس طريقه تشغيل السويتش مع منصه ريموت اكس واي والتحكم من التليفون و من الزرار في نفس الوقت صفحتنا www.facebook.com/seif3mad مجموعة الواتس اب : https://cutt.us/dVIDS دعم المال https://www.paypal.me/seif3mad مجموعة Facebook https://cutt.us/A9tHe ⇊code /* -- New project -- This source code of graphical user interface has been generated automatically by RemoteXY editor. To compile this code using RemoteXY library 2.4.3 or later version download by link http://remotexy.com/en/library/ To connect using RemoteXY mobile app by link http://remotexy.com/en/download/ - for ANDROID 4.5.1 or later version; - for iOS 1.4.1 or later version; This source code is free software; you can redistribute it and/or modify it under the terms of the GNU Lesser General Public License as published by the Free Software F...
بسم الله الرحمن الرحيم وصلاة والسلام على سيدنا محمد مقدمة في السلسلة السلسلة هتكون عن انشاء بروده سمارت هوم من الصفر سوفت وير و هارد وير هنشرح في السلسلة 1-هنتكلم عن انشاء بورده زي ده 2- طريقة اختيار المكونات 3- اختبار المكونات 4-شرح استخدم منصة easy EDA 5-هنتكلم علي البرمجه اختيار المنصة اللي هتناسب البورده توصيل اكثر من متحكم بي بعضه
بسم الله الرحمن الرحيم وصلاة والسلام على سيدنا محمد مقدمة في السلسلة السلسلة هتكون عن انشاء بروده سمارت هوم من الصفر سوفت وير و هارد وير هنشرح في السلسلة 1-هنتكلم عن انشاء بورده زي ده 2- طريقة اختيار المكونات 3- اختبار المكونات 4-شرح استخدم منصة easy EDA 5-هنتكلم علي البرمجه اختيار المنصة اللي هتناسب البورده توصيل اكثر من متحكم بي بعضه


GOO
ReplyDelete